
Quickly grasp the DELEM DA-41T automatic mode guide
2026-06-13

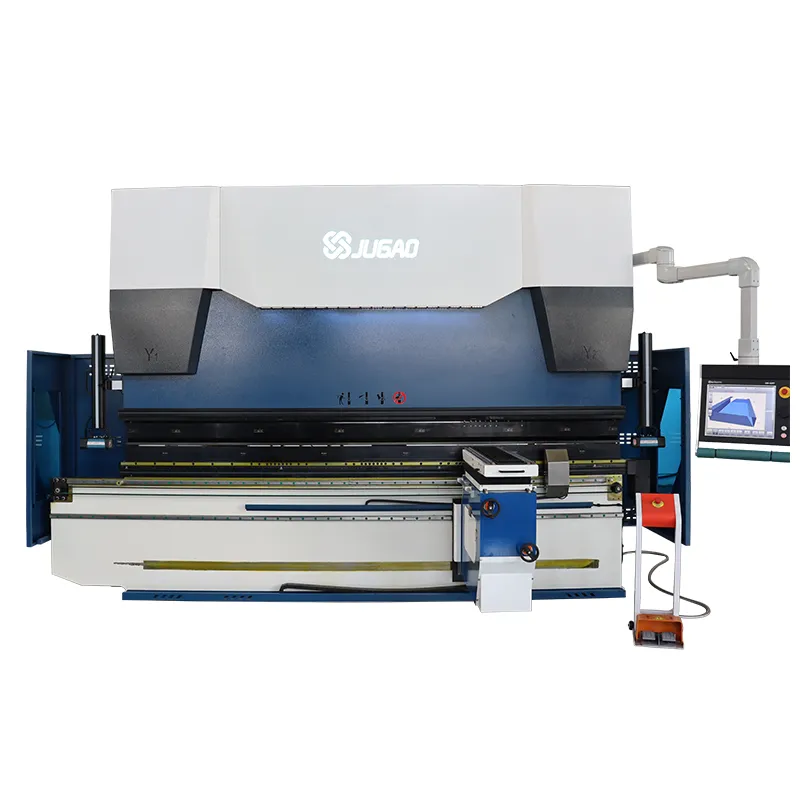
If you’re eager to quickly master the DELEM DA-41T Automatic Mode, you’ve come to the right place. Mastering this mode is essential for maximizing the efficiency and precision of your press brake operations. The DELEM DA-41T Automatic Mode streamlines the bending process by enabling automated sequencing and reducing the need for manual intervention. In this article, I’ll walk you through the key steps and features that will help you unlock the full potential of the DELEM DA-41T Automatic Mode—empowering you to boost productivity and achieve consistent, high-quality results. Whether you’re new to this controller or looking to sharpen your existing skills, this guide offers the practical insights you need to become proficient in its automatic functions.
Understanding DELEM DA-41T Automatic Mode Setup
Step 1: Navigating to Automatic Mode
 To begin, tap the navigation button to switch the DELEM DA-41T to Automatic mode.
Step 2: Creating or Editing a Bending Program
In Automatic mode, you can create or modify a bending program. Remember, this process depends on the machine’s configuration. Some parameters might not appear if they’re not part of your machine’s setup. Begin by ensuring all necessary tools and materials are available and programmed beforehand.
The ‘Properties’ tab defines the general parameters that apply for all program steps.
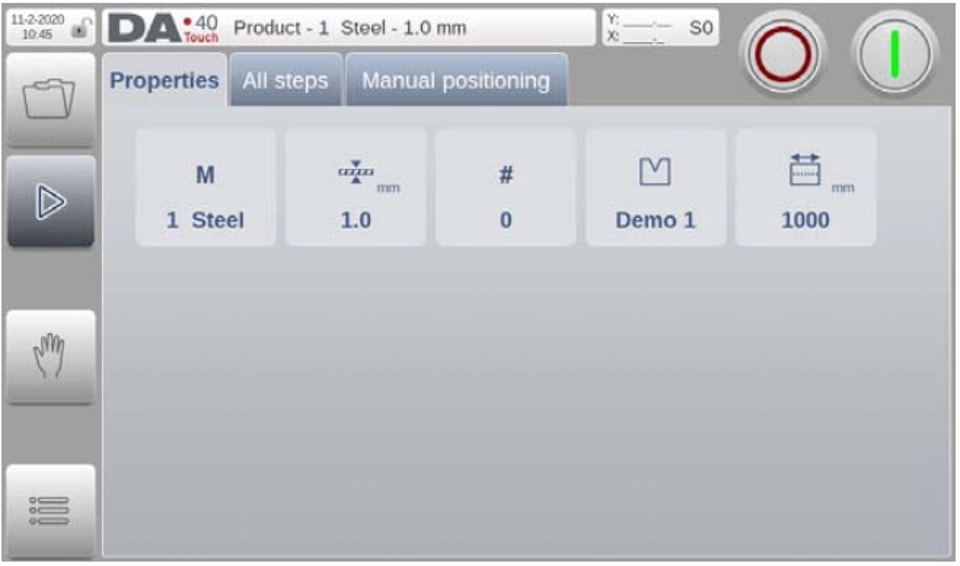
 Material number: The material of the sheet. There are 6 material types available. Material properties can be programmed in Settings mode.
 Thickness: The thickness of the sheet.
 Product width: This value is used for bending force calculation.
 Stock counter: To count the number of products. If programmed to 0, the counter will increase after each finished product. If programmed higher than zero, the counter will count down. When it has reached 0, the control will stop. The stock counter will be reset to the initally programmed value when ‘start’ is pressed.
 Die ID: The name (ID) of the selected die, which is used for this product.
Detailed Steps for Programming
Programming Bending Steps
Each bending program can range from 1 to 25 steps:
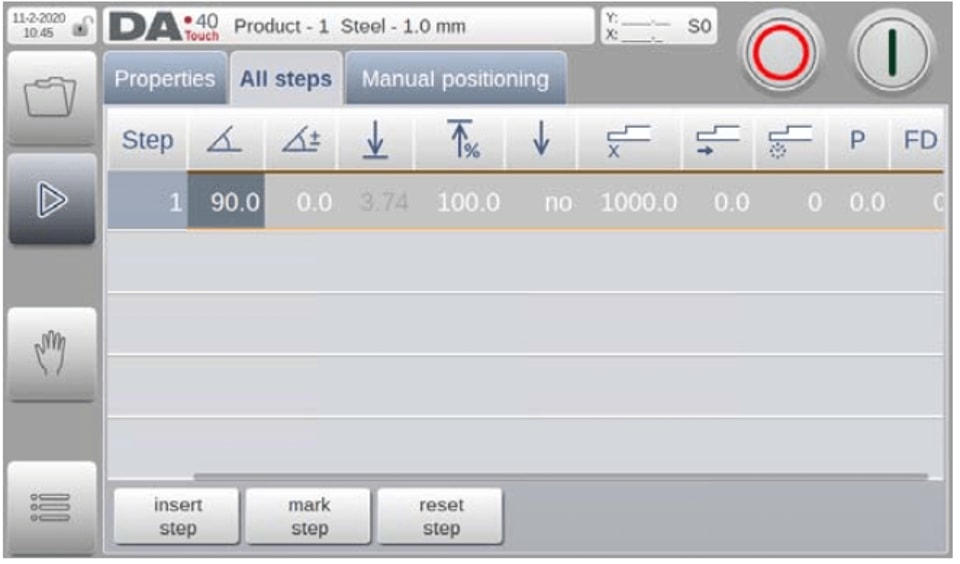
1. Navigate to the ‘All steps’ tab to define the parameters for each step.
2. Start by entering values in the fields provided. Adjust automatic settings as needed.
3. Use the pan function to view additional parameters if your screen is crowded.
4. You’ll have the flexibility to add, delete, or rearrange steps as per your requirement.
Here’s how you can insert, move, and delete steps within a bending program:
l Insert Step: To add a new step, select the number of the step after which you want the new step to be inserted. If adding at the end, choose the last step. Press the ‘insert step’ soft key; a copy of the selected step will be inserted, with the cursor automatically moving to this new step.
l Mark and Move/Swap Step: Select the step you want to relocate or exchange. Press the ‘mark step’ soft key, then choose the target step for moving or swapping. Use the ‘move step’ soft key to relocate the marked step or the ‘swap steps’ soft key to switch positions with the selected step.
l Delete Step: To remove a step, select the step number and press the ‘delete step’ soft key. The chosen step will be deleted, causing the subsequent steps to shift up. In program selection mode, you can delete the entire program if needed.
By effectively utilizing these functions within the DELEM DA-41T Automatic Mode, you can keep your bending programs organized and adapt them quickly to production needs.
Key Parameters for Program Steps
In the DELEM DA-41T Automatic Mode, each line in the program corresponds to a specific step, with the first column indicating the step number. For each step, several parameters can be programmed to optimize the bending process:
 Angle: Sets the desired angle, provided that a tool has been programmed.
 Angle Correction: Adjusts Y-axis values to refine the programmed angle, with a positive correction resulting in a lower beam position.
 Y-axis Bend Depth: This is calculated when an angle is set, where a higher value signifies a deeper beam position.
 Y-axis Opening Time: Set as a percentage of the maximum opening time after completing a bend.
 Y-axis High Speed: Enables higher travel speed for the beam during bending.
 X-axis Position: Determines the backgauge position for each bend.
 X-axis Retract: Specifies the retract distance for the backgauge.
 X-axis Delay Time: Introduces a delay in seconds for the X-axis and FD axis after a step change.
 Bending Force: Automatically calculated to achieve the desired bending effect.
 Function Output: Configurable binary values for digital outputs, which vary with machine settings and are named FD by default.
These parameters allow for precise control and customization of the bending process, enhancing the capability of the DELEM DA-41T in Automatic Mode.
Initiating Program Execution
When you have completed programming all the steps, or have selected an existing program, you can execute it to bend the actual sheet metal parts. Here’s a simplified guide for executing a program in DELEM DA-41T Automatic Mode:
l Switch to Execution Mode:
Press the green start button located in the upper right corner. This action can be performed on both the ‘Properties’ tab and the ‘All steps’ tab.
l Starting the Program:
 Simply press ‘Start’. The control will begin executing the program from the step where the cursor is placed.
l Stopping Program Execution:
 To halt the execution, press ‘Stop’ at any time.
l Monitoring During Execution:
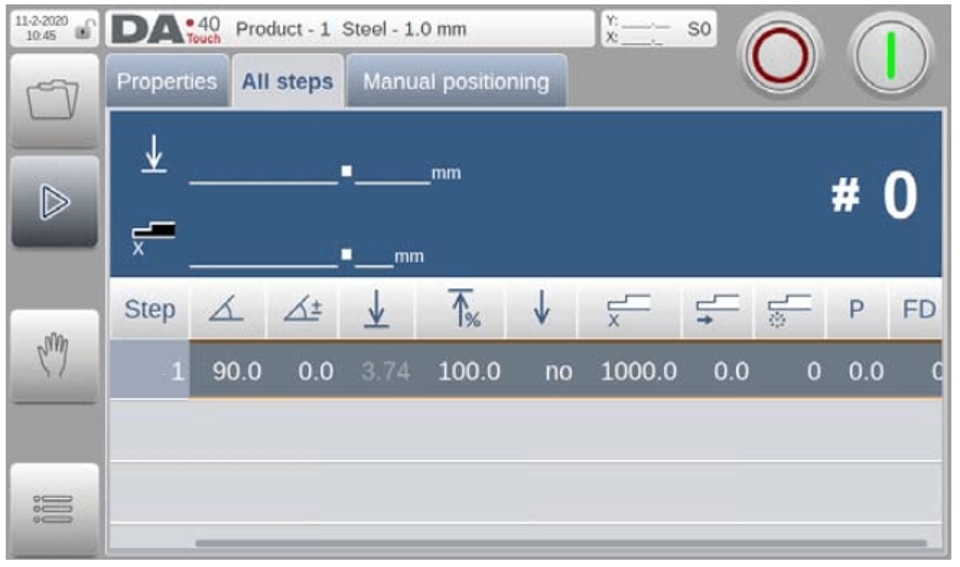
In ‘All steps’, the screen highlights the active program step. View the actual Y-axis and X-axis positions. Monitor the stock counter value.
l Automatic Repeat:
The program will continue to repeat until ‘Stop’ is pressed or the stock counter (#) reaches 0.
l Machine Readiness:
Ensure the machine is ready before starting a program. Programs can only be executed when the machine indicates readiness.
These steps will guide you to perform smooth and efficient program execution in DELEM DA-41T Automatic Mode.
Manual Positioning with DELEM DA-41T
On the ‘Manual positioning’ page in Manual mode and Automatic mode a slider at the bottom of the screen can be used to position the axis.

The distance moved with the slider determines the speed of the axis. When the slider is released, the axis stops. The buttons at each end of the slider can be used to fine-tune the axis position. When “sliding” the beeper gives feedback that the axis is moving.
By following these steps and understanding key components, you will effectively master the DELEM DA-41T Automatic Mode. Regular practice and frequent referencing of the manual will enhance your skill and confidence in operating this sophisticated press brake system.
Conclusion
Mastering the DELEM DA-41T Automatic Mode is crucial for improving both the efficiency and precision of your press brake operations. By following the key steps outlined—such as correctly setting up the machine, programming the steps accurately, and effectively using the diagnostics mode—you can operate your press brake with confidence. Regular monitoring and timely adjustments in this mode will lead to better production quality and reduced downtime.
As next steps, feel free to reach out to our support team with any questions or for further guidance. We also encourage you to explore our comprehensive documentation library to deepen your understanding of the DELEM DA-41T and related technologies. Proper knowledge and correct application are essential to unlocking the full potential of your equipment.
Contact Us