- tel:+86-13222111178
- email:info@ntjugao.com


How to Master CYBELEC CybTouch 6 C Programming?
How to Master CYBELEC CybTouch 6 C Programming?

If you're looking to master the art of sheet metal bending, understanding the fundamentals of CYBELEC CybTouch 6 C programming is essential. In this article, I'll guide you through the process of creating a part program using the CYBELEC CybTouch 6 C, providing the insights you need to enhance your metalworking efficiency. Whether you're a beginner trying to grasp the programming basics or an experienced technician looking to refine your skills, this comprehensive overview will help you unlock the full potential of your press brake operations. Let's dive into the specifics of programming with the CYBELEC CybTouch 6 C and elevate your metalworking capabilities.
Introduction
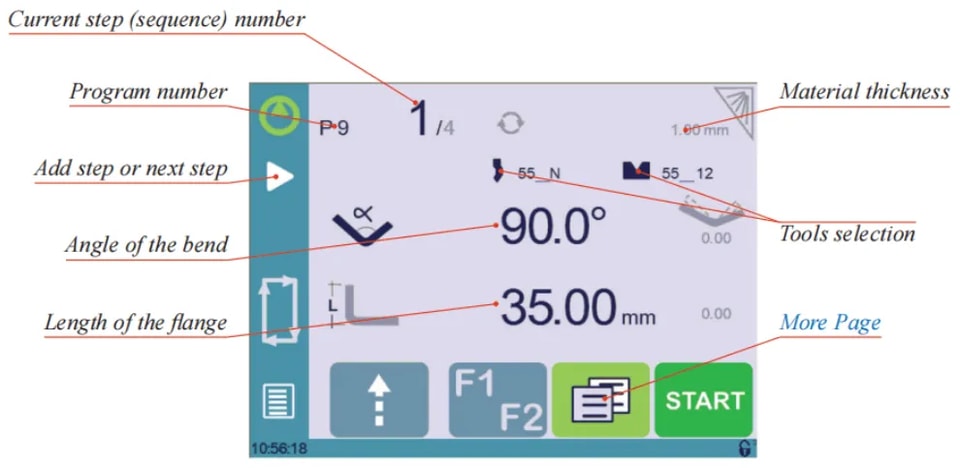
When you switch on the CYBELEC CybTouch 6 C, the first page displayed is the Bend Numerical Page. This critical starting point is where you can effectively begin CYBELEC CybTouch 6 C programming. It allows you to create programs that contain the specific bend sequences required to produce a complete part. Understanding how to navigate and use this page is essential for mastering CYBELEC CybTouch 6 C programming.
Bending with Tools Management
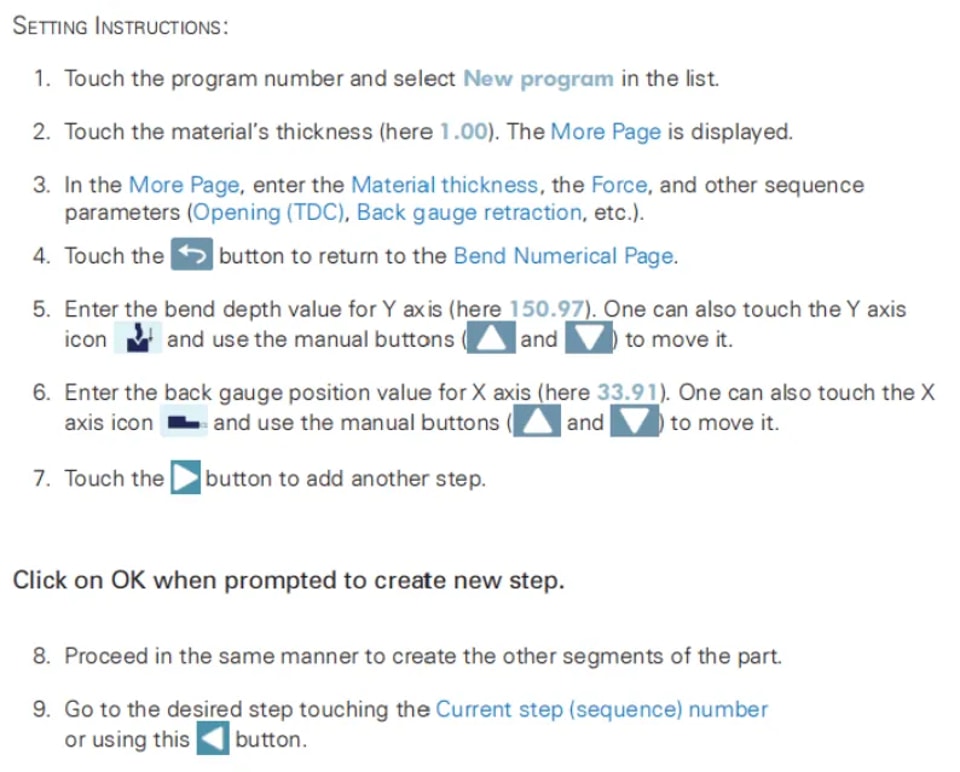
Setting Instructions:
1. Touch the program number and select New program in the list.
2. Touch the material’s thickness (here 1.00). The More Page is displayed.
3. In the More Page, enter the Material thickness, the Force, and other sequence parameters (Opening (TDC), Back gauge retraction, etc.).
4. If necessary, touch the button to activate the Tools Management.
5. Touch the button to return to the Bend Numerical Page.
6. Select the tools to be used for the part by touching their respective icons.
7. Touch the numerical value next to the angle icon, and enter the value for the first bend you wish to create (here 90°).
8. Touch the numerical value next to the segment length icon , and enter the value for the first segment you wish to create (here 35.00 mm).

9. Add the next bend to the program by touching
10. Proceed in the same manner to create the other segments of the part.
11. Go to the desired step touching the Current step (sequence) number or using this button
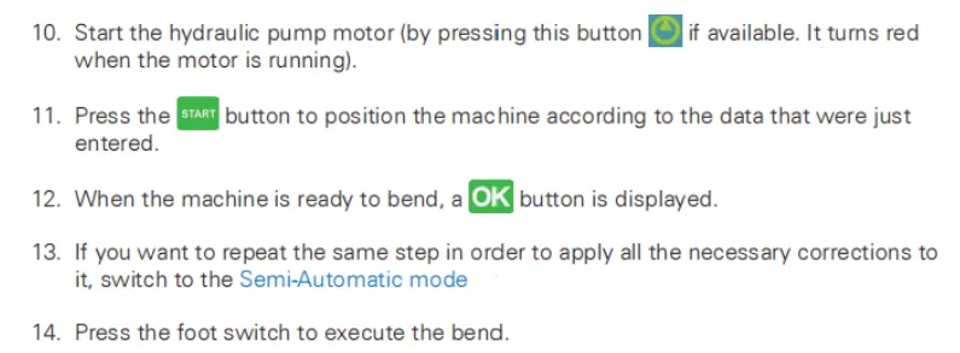
12. Start the hydraulic pump motor (by pressing this button if available. It turns red when the motor is running).
13. Press the START button to position the machine according to the data that were just entered.
14. When the machine is ready to bend, a OK button is displayed.
15. If you want to repeat the same step in order to apply all the necessary corrections to it, switch to the Semi-Automatic mode.
16. Press the foot switch to execute the bend.
Bending and Corrections
To master CYBELEC CybTouch 6 C Programming, all program corrections are efficiently handled in the Bend Numerical Page. Depending on personal preferences, operators can execute the program steps sequentially, making necessary corrections as they go. Alternatively, they can utilize the Semi-Automatic mode to apply all required corrections to a single step before progressing.
Corrections can be made to:
l The angle (Y-axis, see Angle Correction).
l The back gauge position (X-axis, see Back gauge Correction).
Semi-Automatic mode
To master CYBELEC CybTouch 6 C Programming, understanding the semi-automatic mode is crucial. This mode is ideal for operators needing to apply corrections to parts one bend at a time. It allows for the indefinite repetition of the same sequence, enabling adjustments until the desired result is achieved. Once satisfied with a step, you can move to the next using the button. Activating or deactivating the semi-automatic mode is simple—just touch and hold the button for over a second.
Angle Correction
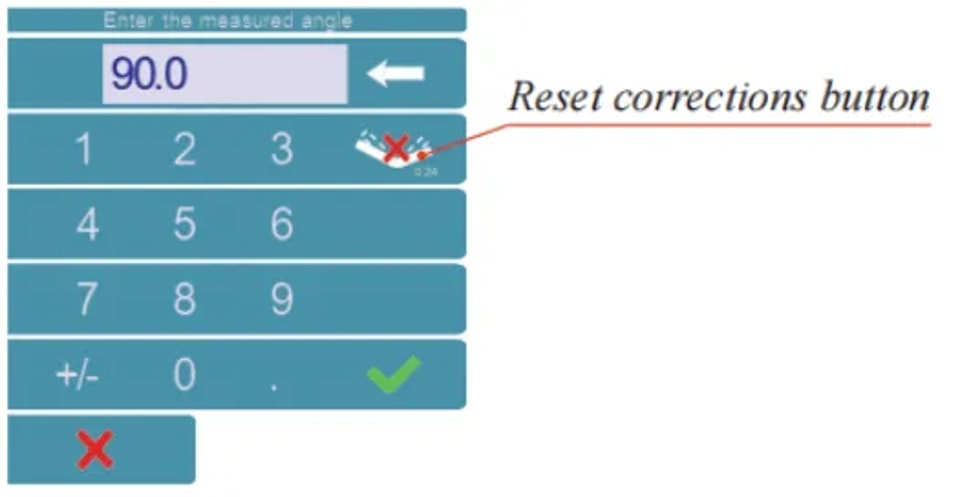
After physically measuring the angle, if corrections are to be made, they must be done as follows, and not directly in the program step.
Setting Instructions:
Touch the angle correction icon, and enter the physically measured value of the angle. The numerical control will automatically calculate the Y axis correction.
Back gauge Correction
In mastering CYBELEC CybTouch 6 C Programming, understanding how to apply corrections efficiently is crucial. You can adjust the back gauge X axis position simply by tapping on the small number next to the flange length on the display. Any necessary correction, whether positive or negative, should be entered manually for precision. By incorporating this technique into your programming workflow, you enhance accuracy and efficiency in your operations, making the most out of your CYBELEC CybTouch 6 C system.
Bending without Tools Management
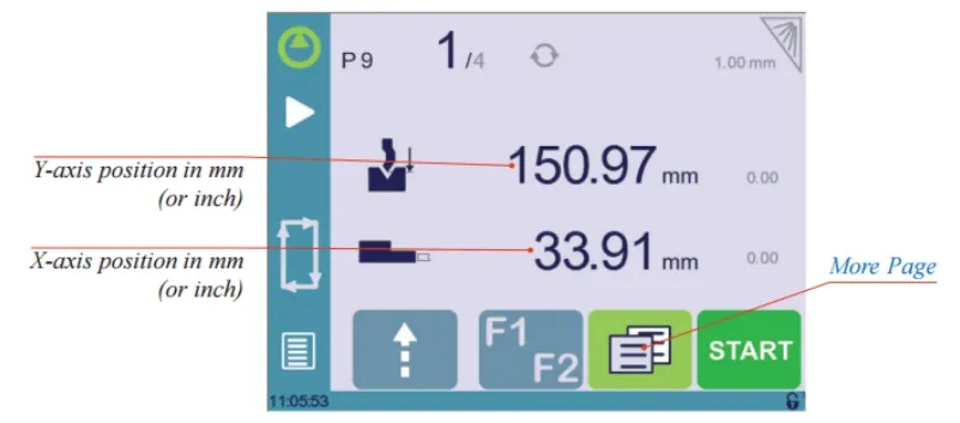
In CYBELEC CybTouch 6 C Programming, working without tools management means you can only program the back gauge value for the X axis and the bend depth for the Y axis using millimeters or inches. This feature is particularly beneficial when tool management is not available, as it allows operators to focus on precise measurements and manual adjustments directly in mm or inches. This approach streamlines the programming process, ensuring accurate bending operations without the need for complex tool selections.
This procedure is also valid if tools management has been disabled.
Next-Part Function
The Next-Part Function in CYBELEC CybTouch 6 C Programming is a powerful feature that allows operators to sequence multiple part-programs seamlessly. This function is particularly useful for creating complex three-dimensional parts, such as a box, or assembling a final product from multiple components.
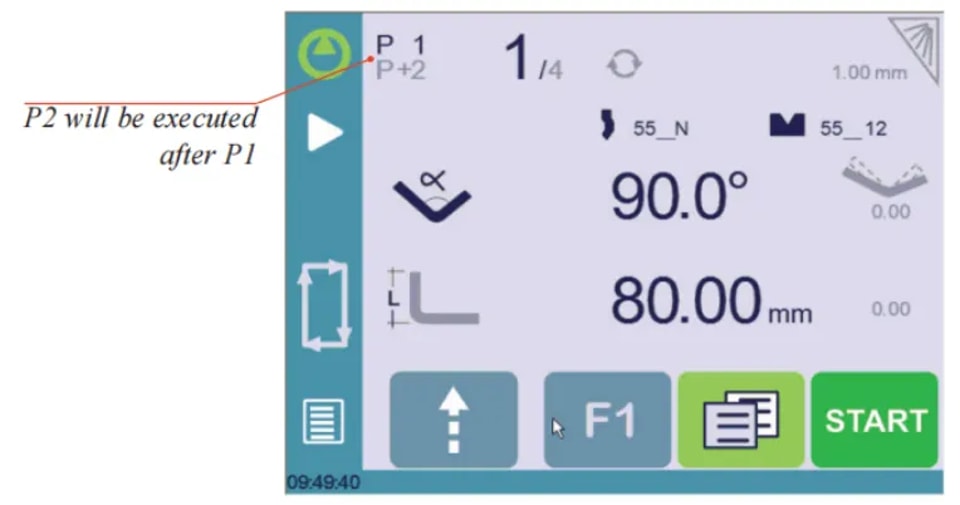
During execution, the CybTouch completes the current program, and instead of returning to the start, it automatically transitions to the next selected program, designated as P+nn. This process continues efficiently, provided that each part is configured with a successive program.
Setting Instruction
1. To activate the Next-Part function, touch the Program number and keep it pressed until the following numerical pad is displayed.

2. Enter the number of the program that must be executed at the end of the current one.
3. Save the program.
Cycles and quantities
Mastering CYBELEC CybTouch 6 C Programming involves understanding the cyclical nature of program sequences.

When configuring an assembly that requires multiple programs, such as a sequence where program 1 leads to program 2, followed by program 3, the final transition from program 3 back to program 1 completes the cycle.
This design ensures that the part counter is incremented when the sequence resets to a lower-numbered program. In CYBELEC CybTouch 6 C Programming, it’s essential to ensure that program numbers increase chronologically when representing a series for a single part.
Conclusion
To master CYBELEC CybTouch 6 C programming for creating a part program, it is essential to follow the outlined steps to ensure efficient operation. By understanding program sequencing and managing part counters accurately, you will optimize the performance of your CNC machines.
To further enhance your skills or address specific queries, we encourage you to contact our team for expert assistance or explore the additional resources available on our website. This proactive approach will help you refine your programming techniques and maximize your production capabilities.
Contact Us