
Efficient Replacement Procedure for Reflective Mirror on JUGAO Laser Welding Head
2026-09-19

Table of Contents
1. Introductory Overview
2. Required Hand‑Tools and Consumables
3. Complete Step‑by‑Step Operating Tutorial
○ Step 1: Release Fastening Screws and Dismantle Motor Rear Housing
○ Step 2: Detach Signal Cable Connector Gently
○ Step 3: Loosen Upper Position‑locking Set Screw
○ Step 4: Extract Motor Functional Module
○ Step 5: Seal Open Cavity With Masking Tape for Dust‑proof Protection
○ Step 6: Unfasten Bracket Screws to Swap Out the Reflective Mirror
○ Step 7: Pay Attention to Orientation While Mounting New Reflective Mirror
○ Step 8: Fine‑tune Angular Position of Reflective Mirror
○ Step 9: Re‑insert Motor Module Back Into Welding‑gun Body
○ Step 10: Fasten Screws and Reconnect Signal Cable
○ Step 11: Execute Red‑light Centering Calibration
○ Step 12: Fit Motor Rear Cover and Secure All Fasteners
4. Closing Summary
Replacing the reflective optical mirror belongs to core maintenance items for JUGAO laser welding handpieces, which helps sustain stable output performance and extend overall equipment service lifespan. Proper routine upkeep is highly significant for laser welding devices. This technical manual delivers full‑range guidance for operators to finish reflective mirror replacement work for JUGAO welding heads. Strictly implement each listed operation, you can complete onsite maintenance independently and keep your welding unit running steadily.
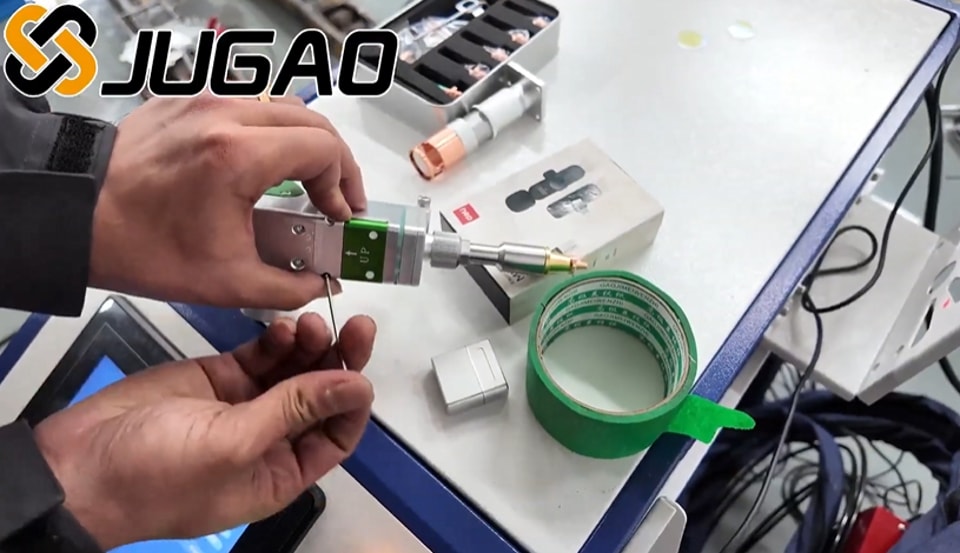
Introductory Overview
Carrying out reflective mirror replacement correctly is critical to retain high‑efficiency output and processing precision of JUGAO laser welding machinery. As cumulative operating hours rise, the reflective mirror surface will accumulate dust, metal spatter and other impurities, which will gradually trigger surface wear and optical performance degradation.
Such deterioration will weaken laser beam reflection and transmission effect, further lowering welding seam quality. Damaged optical components may result in defective welding joints, unsatisfactory machine performance and extra repair expenditure. Timely renewal of defective reflective mirrors can avoid production efficiency decline, making sure JUGAO equipment can generate steady, repeatable welding outcomes that satisfy industrial manufacturing requirements.
This step‑wise operation guide enables workshop technicians to finish reflective mirror swapping efficiently without calling for external engineer support. Both seasoned maintenance staff and front‑line operators can follow these clear instructions for every disassembly‑and‑assembly phase. Correct execution not only restores welding‑gun optimum working status but also prolong hardware service life. Keeping optical mirrors free from contamination and scratch helps you cut unplanned production halt, improve operational safety and guarantee welding dimensional accuracy. Mastering these maintenance skills represents worthwhile investment for both equipment reliability and workshop project yields.
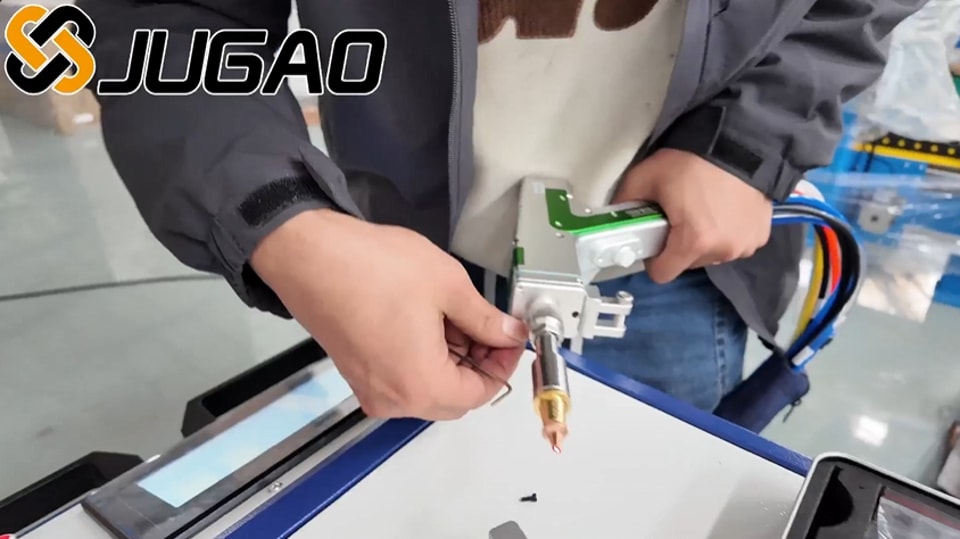
Required Hand‑Tools and Consumables
Before you start disassembly work, prepare below‑listed supplies in advance:
• Multi‑spec screwdriver toolkit
• Masking protective tape
• Brand‑new original JUGAO replacement reflective mirror
• Lens‑special wiping tissues or soft lint‑free cloth
Getting these articles ready will smooth out the whole mirror‑replacing workflow and prevent missing any critical operating links.
Complete Step‑by‑Step Operating Tutorial
This chapter elaborates detailed operations for successful reflective mirror replacement. Every procedure is designed for easy understanding, allowing operators to conduct maintenance for JUGAO welding heads inside factory workshops.
Step 1: Release Fastening Screws and Dismantle Motor Rear Housing
Start maintenance work by unscrewing fixing fasteners on the JUGAO laser welding head. Take off the motor rear housing carefully. This operation exposes inner mechanical assemblies and creates operating space for subsequent reflective‑mirror replacement tasks.
Step 2: Detach Signal Cable Connector Gently
Pull out the signal cable plug‑in connector with moderate force. Secure sufficient operating clearance for follow‑up disassembly. Handle wiring harness with extra caution; do not scratch or twist cables, otherwise reassembly work will be obstructed.
Step 3: Loosen Upper Position‑locking Set Screw
Locate the upper set screw and turn it loose. This operation creates preconditions for pulling out the motor module, which is an indispensable step within the reflective mirror renewal process.
Step 4: Extract Motor Functional Module
Slide out the whole motor module slowly and steadily. This move grants access to the reflective mirror mounting bracket, where the mirror replacement procedure will be carried out.
Step 5: Seal Open Cavity With Masking Tape for Dust‑proof Protection
Stick masking tape over exposed internal openings. This preventive measure stops dust, metal debris and airborne contaminants from falling into welding‑gun inner chambers during component swapping, preserving internal optical environment cleanness.
Step 6: Unfasten Bracket Screws to Swap Out the Reflective Mirror
Unscrew the holding screws fitted on reflective mirror support bracket. Take away the aged defective reflective mirror and mount the brand‑new spare part. Always operate with great care when touching optical elements; surface scratches will impair beam reflection performance.
Step 7: Pay Attention to Orientation While Mounting New Reflective Mirror
When installing the new reflective mirror, you must align its light‑receiving face toward the direction of cable connector port. Correct orientation lays the foundation for ideal optical reflection and normal equipment functioning.
Step 8: Fine‑tune Angular Position of Reflective Mirror
Adjust the tilt angle of newly‑installed reflective mirror. Check that its left‑and‑right swing amplitude keeps consistent. This calibration guarantees qualified light‑reflection trajectory.
Step 9: Re‑insert Motor Module Back Into Welding‑gun Body
After finishing mirror installation and angle tuning, place the motor module back into the welding‑gun main body gently. Make sure components sit in place reliably after replacement.
Step 10: Fasten Screws and Reconnect Signal Cable
Tighten all relevant fixing screws, then insert the signal cable connector back into its corresponding socket. This step completes major mechanical reassembly, making the welding head ready for alignment verification.
Step 11: Execute Red‑light Centering Calibration
Reflective mirror replacement must be followed by red‑light centering adjustment. Achieving accurate red‑light positioning is essential to guarantee subsequent laser welding precision. Beam alignment directly decides final processing effect of JUGAO welding equipment.
Step 12: Fit Motor Rear Cover and Secure All Fasteners
Mount the motor rear housing back onto welding‑gun body and fully tighten all fastening screws. Now the full reflective mirror replacement workflow comes to completion, and the whole assembly is locked for regular operation.
Closing Summary
As long as you follow the above segmented operations, reflective mirror replacement on JUGAO laser welding handpiece can be accomplished smoothly. Performing periodic inspection and timely mirror renewal keeps your welding‑gun staying at optimum working condition and delivering stable, precise welding performance continuously.
Using this tutorial, on‑site staff are capable of finishing this maintenance job independently, lowering expenditure for inviting external technical service.
When all steps are implemented properly, JUGAO laser welding equipment can provide dependable processing capacity for your workshop. Bear in mind that timely maintenance for reflective optical mirrors is one key factor to obtain high‑quality welding results for all manufacturing assignments.
Contact Us